It bakes bread, too.

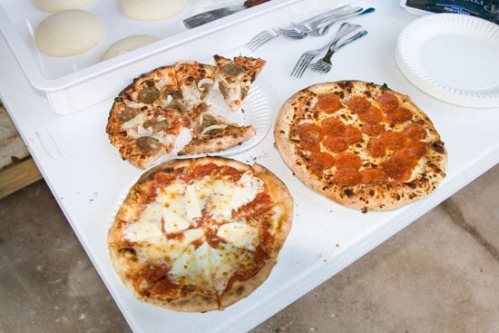
I used some leftover pizza dough as the pate fermentee for a pain de campagne today.

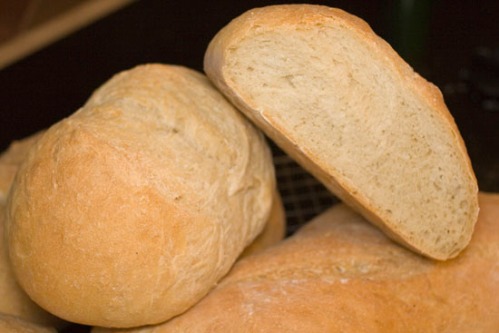
The bread turned out ok, but plenty of room for improvement.

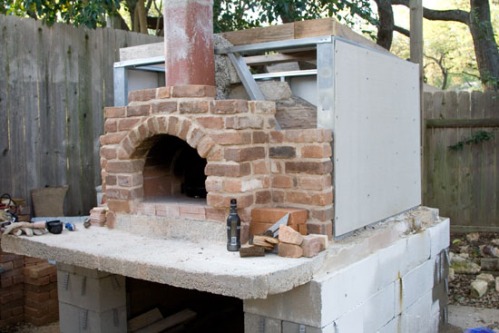
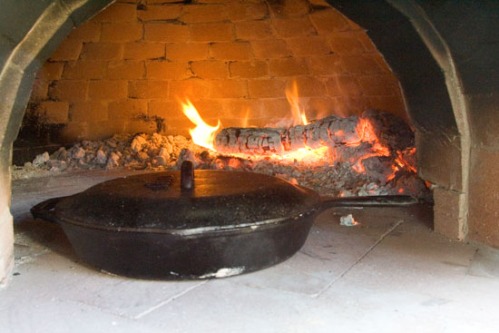
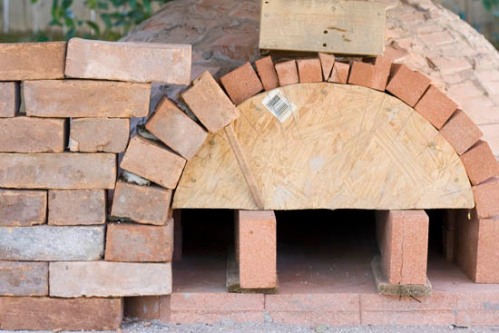
I started baking at around 425F.  Unfortunately, I didn’t get the oven hot enough by the time the dough was ready, so the crust isn’t very brown, and it took about 30 minutes just to get where it was.

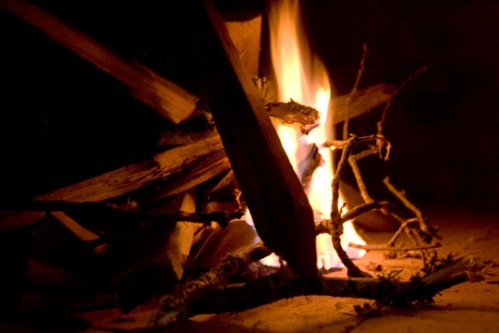
Also, I wasn’t careful about getting all of the coals out of the oven.  Some of the remaining coals continued to smoke after the door was closed and the loaves were baking, giving the bread a little bit of a smoky taste.  It’s not bad, but not great either.

Bread

What’s big, red, and makes tasty pizza?

Final tally, 12 pizzas cooked to perfection and 1 fumble. The crowd pleasers were a pesto, goat cheese, and prosciutto pizza, and a provolone, olive, artichoke heart, and roasted pepper pizza.

I poured the perlite insulation into the top of the oven housing today. The builder-grade perlite really flows like water. It didn’t stop running out of the tiny joints in my hardibacker panels, so I sealed them up with duct tape! When I’m ready to stucco, I’ll have to either just stucco over the tape, or pull the tape and slap some mortar on there in a jiffy.

The first pizza was just sauce and cheese (and crust). It cooked in about 3 minutes, with a dome temperature of 750F and heart at 550F. I’m sure there’s still a little water in the structure, especially in the bottom layer of insulation, as we’ve had a lot of rain lately, and the enclosure is not weatherproof. A nice wide roof will help a bunch. When the cooking was finished, I could feel the warm, moist air coming up out of the loose perlite.

Here’s some pictures of the pizzas, a Four-Cheese, a Sausage-Onion, and a Pepperoni.
firstpizzas

Here’s my cooking area. I haven’t completely traded the trowel for a peel yet. There’s still work to be done!
me cooking

No bricks were harmed in the firing of this oven.

However, some hairline cracks appeared in the mortar on the outside of the dome.  There are several, and they form a more-or-less continuous network over the entire dome.  I understand it’s to be expected.  As long as great big chunks of masonry don’t fall into my food, I’ll sleep pretty well at night.

I took down the lath and perlcrete that I had put up over the chimney, because frankly, it looked terrible.  It was sagging, out of square, and lopsided.  I built a steel frame for the chimney facade, which I will attach hardibacker to, then stucco.

I’m starting to get away from my drawing design just a bit, either to save time or to make a better structure.   I don’t want to take any chances on water getting in, so after getting the chimney up, the next task will be to put a shed roof on.  Nothing fancy, just plywood and shingles.  Then, a little stucco around the top, limestone around the bottom, a hunk of granite for a countertop, and we’ll be all set.oven-framed

Time to eat.

The curing fires must be driving out the moisture. I got the dome of the oven up to 950F today. The outer surface of the dome was up to about 275F, indicating that most of the moisture must be out. Once I get a sturdy roof over the oven, all will be well.

I didn’t have any dough, so I decided to put tonights dinner into the oven. Since I initially fired it with pallet boards and cedar, I waited until there was no smoke, and only coals remaining. These were pushed to the side, and I threw on three smallish oak logs.

Tonights dinner was oven-roasted chicken, oven-roasted asparagus, and oven-roasted curly fries, with some sweet-potato fries as well. I put the chicken in a cast iron skillet, and put it into the oven when the dome was at about 800F and the floor was 650F. The skin started burning after about a minute, so I covered it up and moved it halfway out the door of the oven.

firstfood

Here’s that chicken.
chicken

The asparagus was tossed in a little olive oil, salt, and pepper. I’ve never roasted asparagus before, and this is now my favorite recipe! Much better than steamed or boiled.
asparagus

The frozen fries did great too. Not as good as homemade, but certainly adequate.
dinner

Flame on.

Three walls  are on.  The chimney is covered in lath and perl-crete.  I just found out that the masonry store has perlite for 1/3 the cost of the hydroponics store, so I’ll be filling the entire enclosure with perlite, rather than messing around with chicken wire or partitions.

The dome has had about a month to cure on its own.  The evenings are getting warmer, so it’s time to get moving.  I lit the first fire tonight.  Just a pile of sticks, really.  Probably a little larger than the “1 newspaper” fire recommended by the fornobravo folks, but the oven seemed pretty dry.

firstfire

It burned for about 30 minutes.  The smoke went right up the chimney, not much was escaping out of the front.  After it was finished, the outside of the dome was slightly warm to the touch.  No cracks yet.

Framed, ready to finish.

I’ve got the steel frame put together and anchored down. Studs are about 16 inches on center, although I got a little creative with the front, since I couldn’t run track across the opening.

framed

I initially built the frame with a 0.25/12 pitch, planning for a flat roof covered with ceramic floor-tiles. I later decided to just use some leftover metal roofing. This called for a steeper pitch, to keep water from pooling or running back under the overlapping pieces. So, I cut a 2×4 on the slant and screwed it to the frame from below.

The walls will be stucco. I’m debating whether to use a backerboard, or expanded metal lath. Does it matter?

Anchoring the frame.

I poured the perlite layer over the entire hearth slab. I mentioned in a post on Fornobravo that I was not sure how to anchor the steel frame of the oven enclosure into the perlite layer. Here’s what I ended up doing:

I snapped a chalk line to give me about 5 inches of perlite insulation from the hearth brick to the inside surface of the future wall. Then, I used a wide putty knife and a hammer to cut out blocks of perlcrete. The blocks came out easily, and will come in handy when filling the enclosure with loose perlite.

Some photos of the process:
PerliteCut-1
PerliteCut-2

Having exposed bare concrete, I used a powder-actuated nailer to shoot 1-inch nails through the steel track and into the concrete slab.  It was a lot of fun!

Ramset HD-22

Vent arch built.

And here’s what the vent arch looks like now. I did away with the brick chunks, and just cut one brick to bridge the gap on either side of the opening. This vent is all ready for the chimney!

Vent Arch 1

Vent Arch 3

Vent Arch 2

The vent arch.

Here’s a mockup of the vent arch.  The lower part of the arch is made up of 9-inch firebrick, split the long way to make square-ish blocks.  The arch is bridged by 1-inch pieces, leaving an eight inch opening at the top.  The wooden box represents the flue liner.

The arch only has to support for feet of flue liner, so hopefully I can get away with the puny voussoirs across the top.

This arch will be insullated with perlcrete, and the adobe bricks will surround the insullation, forming a type of abutment to support the arch.  The chimney will either be insullated with perlcrete covered with stucco, or will have an air gap, and then stucco supported by metal framing.

Vent Arch Mockup

A ton of bricks.

Okay, so maybe I didn’t buy a whole ton. Maybe half a ton. Okay, 180 bricks. The brickyard had “Old Chicago” bricks, which were taken from demolished buildings in Chicago. Those bricks were 80 cents each. They also had some bricks made in Mexico that are meant to resemble the Chicago bricks. These were somewhat cheaper. Only 50 cents each.BrickStack

Here’s what they look like closeup.

brick-closeup

Nice and rustic. That should blend well with my rustic bricklaying skills. Hopefully the patina on these bricks will hold up. Just rinsing them with the hose removed a little of the color and sand that provided the antique look.